
Installing Piztu isn’t just «running a .deb». It’s setting up an entire classroom so that a single computer —the teacher’s— can power on, lock, hand out work and collect evidence from twenty machines at once.
That’s why the installation has two clearly separate halves:
- The installer gets the server ready (the teacher’s machine).
- The «Classroom» section inside Piztu gets the clients ready and describes the room.
Order matters, and each step builds on the previous one. This post explains the why behind each decision, not just the how.
1 · Before touching anything: think of the classroom as a whole
Piztu assumes a very specific classroom model:
- One server, which is the computer you teach from. Piztu and the
salt-master(the «brain» that sends commands to the rest) are installed here. - N clients, the students’ machines. Piztu is not installed on these: they only receive an SSH key and a
salt-minion.
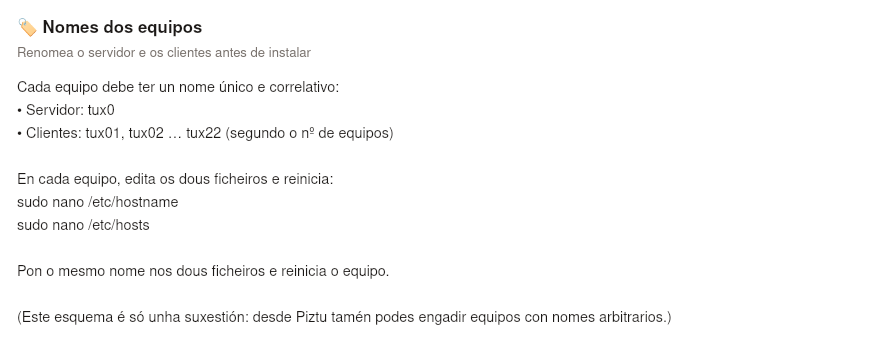
Naming the machines
The installer suggests a sequential scheme:
| Role | Name |
|---|---|
| Server | tux0 |
| Clients | tux01, tux02, … tux22 |
On each machine you edit the two files and reboot:
sudo nano /etc/hostname
sudo nano /etc/hosts     # the same name in both
sudo reboot
Why this matters methodologically: Piztu generates the inventory from a prefix (tux) and a number (22). If the names are consistent, describing the classroom comes down to entering two values. If they aren’t, you have to go machine by machine. The scheme is a suggestion: later on Piztu also lets you add machines with arbitrary names («Discover the network»), but this is the fast path.
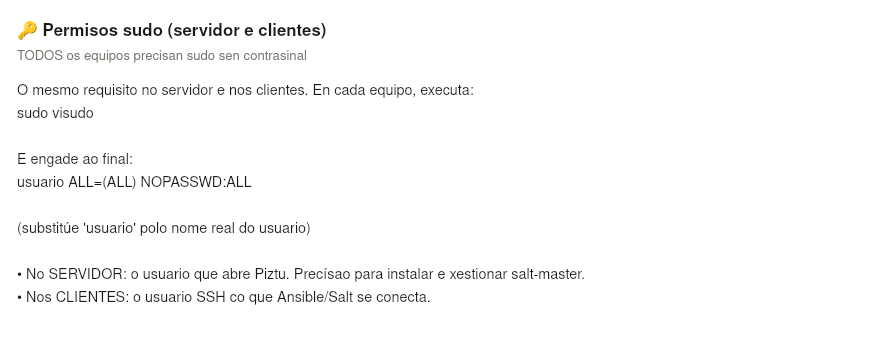
Passwordless sudo (server and clients)
On every machine:
sudo visudo
# add at the end:
usuario ALL=(ALL) NOPASSWD:ALL
- On the server: the user who opens Piztu needs it to install and manage
salt-master. - On the clients: it’s the user Ansible/Salt connect as over SSH to run the commands (power on, lock, copy files…).
Without this, every action on the classroom would ask for a password per machine: 22 passwords just to turn the class on. Piztu’s model is a managed classroom: the convenience is paid for by assuming the classroom network is trusted.
SSH on the clients
Each client needs the SSH server running:
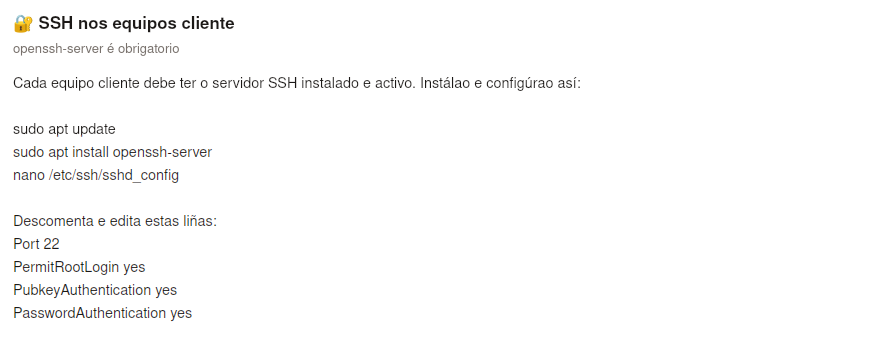
sudo apt update && sudo apt install openssh-server
In /etc/ssh/sshd_config these must be enabled:
Port 22
PubkeyAuthentication yes
PasswordAuthentication yes   # only the first time, to hand out the key
Key idea: PasswordAuthentication is only needed once, at the moment the shared key is distributed. After that Piztu logs in with the key and it can be turned off.
2 · The Piztu installer
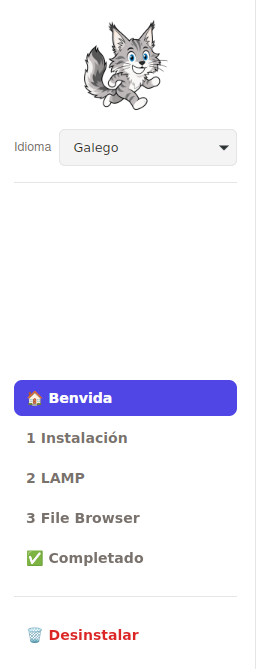
The installer is a graphical application that only acts on the server. It needs administrator privileges (it asks for them automatically via pkexec; if that’s unavailable, run it from the terminal with sudo ./piztu-installer). It needs root because it installs to /opt/piztu, adds packages with apt, enables salt-master and creates system shortcuts.
You can close it and continue later: the steps are independent.
Step 0 — Welcome
It installs nothing. It’s a reminder of the three prior requirements (names, sudo, SSH). Methodologically it’s the most important step: if you skip it, everything else fails later on and in a confusing way.
Step 1 — Installation (mandatory)
This step is the engine for everything. It does the following, in this order:
- Copies the Piztu files to
/opt/piztu. - Installs the system dependencies:
ansible,sshpass,openssh-client— running commands on the clients.wakeonlan— powering on machines that are off.avahi-daemon,avahi-utils,libnss-mdns— resolving.localnames (without this,ssh tux01.localdoesn’t work).alsa-utils— the built-in noise monitor.curl,gnupg— to add the SaltProject repository.
- Adds the SaltProject repository and enables
salt-masteron this server. The clients’minionsare installed later, from within Piztu. - Fixes the permissions of the scripts (
lanzar_piztu.sh,piztu,tao-helper…).
If the bulk install fails because of a missing package, it retries package by package so it doesn’t abort everything over a single dependency.
Step 2 — LAMP (optional)
Installs Apache + MariaDB + PHP on the server. Skip it if you already have a web server. Its only purpose is to host the next step (File Browser). It asks for the MySQL root password, which is never written into the code: it’s passed to the playbook in a temporary file with 600 permissions.
Step 3 — File Browser (optional)
File Browser is the piece that lets students upload and download files from the browser. It requires a running web server (the one from the previous step or your own).
Here there’s a classic point of confusion worth getting right. Two different users are created:
| User | Where it’s entered | What it is |
|---|---|---|
admin |
here, in the installer | The file server account. It stores every student’s work. |
director |
later, inside Tao | The teacher’s personal account for managing Tao (subjects, students). |
They can’t be merged: they live in different places and do different things. The admin password requires at least 12 characters. When it finishes, the installer also enables the piztu-historial service (a log of who used each machine and when).
Step 4 — Completed
It creates the shortcuts (the Education → Piztu menu and the desktop). The installer ends here, but the classroom isn’t configured yet. The installer’s own text says so: to add machines, distribute the key and generate the inventory, «open Piztu and use its own wizard».
Danger zone
Uninstallation is granular and reversible in parts: you can remove just File Browser, just LAMP, or Piztu entirely. Each action is independent and checks its own state. It’s a design decision: nothing Piztu installs is left «stuck» to the system with no way to undo it.
3 · The «Classroom» section inside Piztu
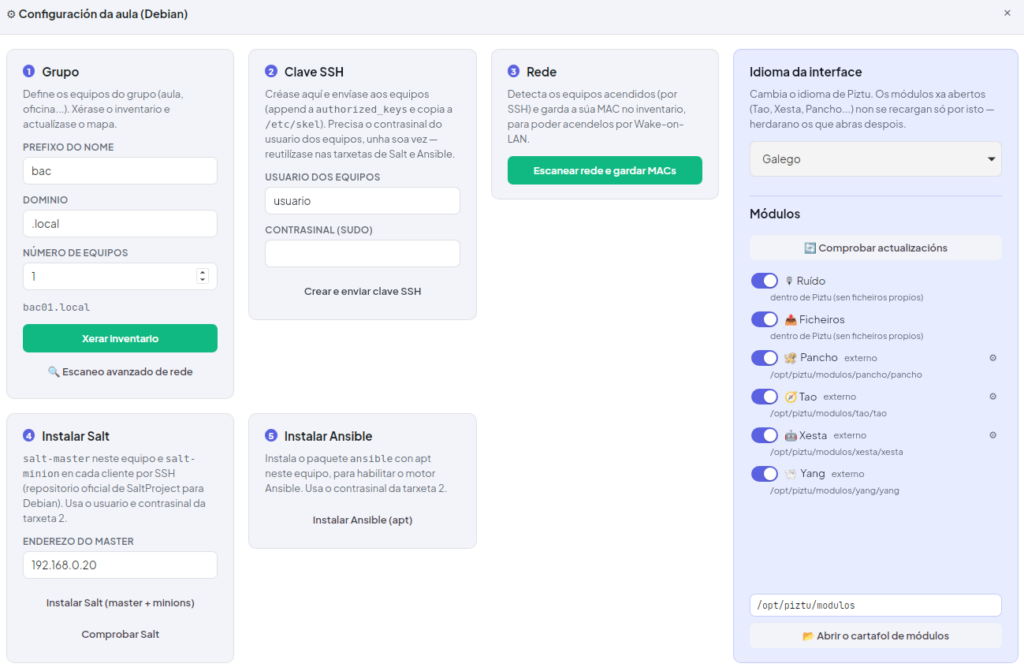
Open Piztu and go to ⚙ Classroom. This is the wizard that prepares the clients. Follow this sequence (each step needs the previous one):
3.1 · Generate the inventory
You enter three values: prefix (tux), domain (.local) and number of machines. Piztu writes the hosts file with tux01.local … tuxNN.local. It’s «describing the classroom» in a form.
Alternative for non-sequential names: Discover the network. Piztu scans port 22 on the local network and lists the machines it finds, even if they follow no convention.
3.2 · Distribute the SSH key
Piztu generates a shared classroom key (~/.ssh/id_rsa_piztu_aula) and pushes it to every machine in the inventory. The clients’ SSH username and password are asked for just once. From here on, Piztu logs into every machine without a password.
If you used «Discover the network», each machine can have its own username/password; the password is only used for that one-off distribution, and the machines where it works are added to the inventory.
3.3 · Configure Salt
Piztu sets up the default execution engine:
- (A)
salt-masteron the server (Linux only). - (B)
salt-minionon each client, installed over SSH with the key from the previous step. - (C) automatic acceptance of the minions’ keys on the master.
First it cleans up any previous installation: it starts from scratch on every attempt (it’s idempotent). The master’s address is derived from the server name + the classroom domain; you only touch the field if the master is on another machine.
3.4 · Scan the network
Piztu connects over SSH to each machine, detects the ones that are powered on and saves their MAC in the inventory. This is what later lets you power on the classroom via Wake-on-LAN with a single click.
3.5 · Install Tao on the clients
It deploys Tao (the students’ session tool: screen lock, file browser, history) to /opt/piztu on each client, with a shortcut in the menu and on the desktop. Repeatable whenever new machines arrive, without going back to the installer.
3.6 · Enable modules
In ⚙ Classroom → Modules you enable the optional pieces: Tao, Xesta (an AI assistant that generates Ansible/Salt scripts), Pancho (a machine→user→IP report as a PDF), the noise monitor… Each module is requested and granted permission at the moment the teacher enables it.
3.7 · Place the machines on the map
Finally, you drag the machines onto the classroom image (the photo above) until the map matches the real layout of the room. The position is saved and you don’t have to do it again.
4 · Philosophy: why the installation works this way
- Minimal intrusion on the clients. Piztu isn’t installed on them: just a key and a minion. All the «heavy» stuff lives on the server.
- Order builds. Inventory → key → Salt → MACs → Tao. Each step assumes the previous one worked; skipping one gives confusing errors.
- Idempotency. Repeating any step is safe: it cleans up and does it again.
- Reversibility. The «danger zone» undoes the installation in parts.
- The teacher is in charge. Credentials are entered each time, not stored «forever»; modules are enabled by hand; nothing runs without consent.
With this, a classroom of 22 machines becomes governable from a single screen.
Piztu — Martín Pardiñas · piztu.org · GPLv3 License